How to Use Moringa Powder in Baking Without the “Green” Aftertaste
You want the color. You want the gentle, leafy depth. But you do not want that “green” finish that lingers like lawn clippings on the back of your tongue. This is where moringa powder baking becomes less about dumping in a superfood and more about craft: particle size, hydration, heat, fat, and the way aromatics bloom in batter.
In an herbalist kitchen, moringa is treated like a plant first and an ingredient second. The goal is balance. You build a soft landing for its chlorophyll notes (think vanilla, citrus peel, warm spice, browned butter), and you use tiny “bridge” flavors that make the palate read “fresh and baked” instead of “raw and grassy.” For kombucha makers, the same mindset applies: you chase consistency, you weigh, you write batch notes, and you control when and how the plant touches water.
Below is a repeatable approach that keeps the green vibe bright and pleasant, while keeping the aftertaste clean.
Why moringa can taste “too green” in baked goods
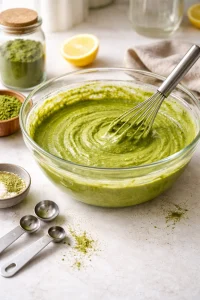 The “green” aftertaste is usually a stack of small issues, not one big mistake.
First, moringa powder is rich in plant pigments and fine particles. Those particles cling to saliva and coat the tongue. If the batter is low in fat, low in sweetness, or under-flavored, the plant character hangs around longer than you want.
Second, moringa’s aroma is delicate. High heat can mute the top notes and leave you with a flatter, more vegetal base. That’s why cookies can taste greener than muffins even at the same dosage: thinner shapes bake hotter and faster, and you lose the perfumed part.
Third, hydration matters. If you stir moringa into a wet batter and bake immediately, the powder may not fully hydrate. Dry specks can survive the bake, and those specks read as bitterness and “raw green.” A short rest fixes a lot.
This is the foundation of moringa powder baking without the aftertaste: hydrate it, cushion it, and give it aromatic partners.
Ingredient choices that reduce aftertaste from the start
Start with moringa that smells fresh. Open the bag or jar and inhale. You want a clean, leafy scent, not dusty, hay-like, or fishy. If the aroma is dull, you’ll compensate by using more, and that’s how aftertaste creeps in.
For the simplest setup, keep two essentials on hand:
Use a vibrant, fine grind like moringa powder.
Add a tiny “bridge” spice like black pepper.
That second line surprises people, but herbalists know: a pinprick of pepper can lift aroma and shorten the finish. You’re not making it spicy. You’re giving the palate a cue that reads “warm and baked” instead of “raw leaf.”
A few other ingredient choices do heavy lifting:
Fat matters. Butter, coconut oil, and full-fat yogurt create a softer mouthfeel and reduce tongue-coating.
Sweetness matters. Not “more sugar,” but enough sweetness to round edges. Honey, maple, or brown sugar often taste smoother than white sugar at the same sweetness level.
Acid matters. A small amount of lemon juice, yogurt, buttermilk, or fermented dairy brightens flavor and makes green notes taste fresher.
If you want a citrusy lift that feels “clean,” try adding organic lemon peel in batters where moringa is present.
Moringa powder baking ratios and mixing methods (grams + teaspoons)
If you remember one rule: start lower than you think, and increase only after a full cool-down taste test. Warm baked goods hide bitterness. Once cooled, the finish shows itself.
Reliable dosage ranges
Use this as a baseline for moringa powder baking:
Mild (everyday): 0.6% to 1.0% of flour weight
Medium (noticeable green): 1.0% to 1.6% of flour weight
Bold (risky for aftertaste): 1.6% to 2.2% of flour weight
If you’re not weighing flour, use these practical conversions (approximate, because grinds vary):
1 teaspoon moringa powder: about 2 grams
1 tablespoon moringa powder: about 6 grams
Example ratios you can copy
For a batter using 250 g flour (about 2 cups all-purpose):
Mild: 2 g to 2.5 g moringa (about 1 to 1 1/4 tsp)
Medium: 3 g to 4 g moringa (about 1 1/2 to 2 tsp)
Bold: 5 g moringa (about 2 1/2 tsp)
For pepper as a bridge:
0.05% to 0.1% of flour weight is plenty
For 250 g flour: 0.1 g to 0.25 g black pepper (a very small pinch, about 1/16 tsp)
Mixing method that reduces “green specks”
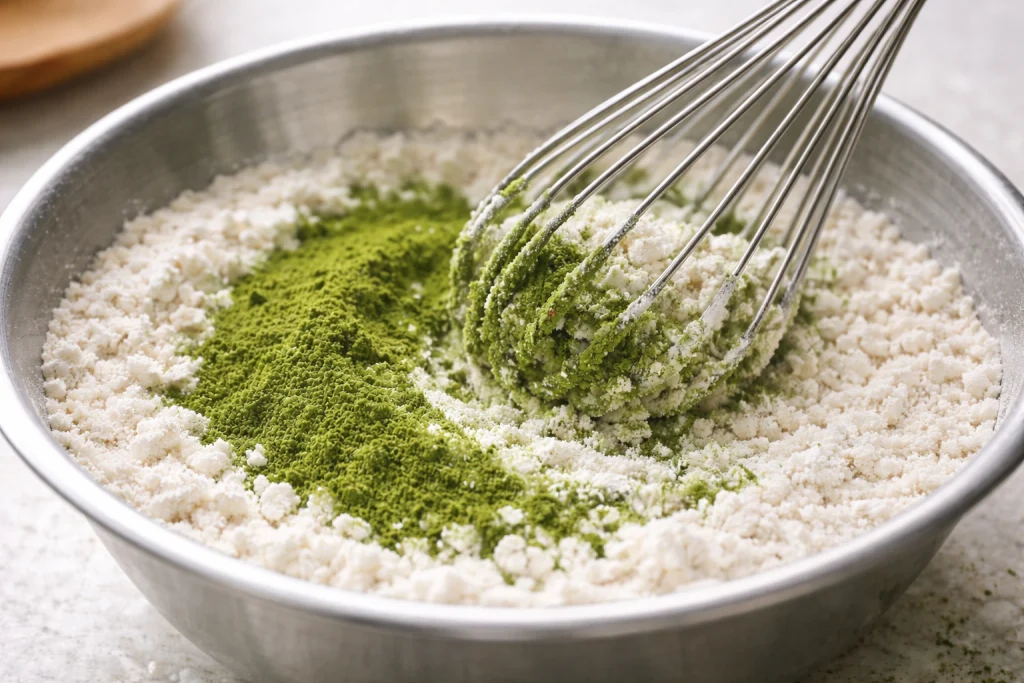
Whisk moringa into your dry ingredients first (flour, leavening, salt, spices). This disperses it.
Separately whisk your wet ingredients until smooth.
Combine, then rest the batter 8 to 12 minutes before baking. This hydration rest is a cheat code.
If you’re doing pancakes or waffles, that rest also improves browning and texture, which helps the flavor read “toasty” instead of “leafy.” This step alone upgrades moringa powder baking in a way you can taste.
Flavor architecture: pairings that make moringa taste “baked” not “raw”
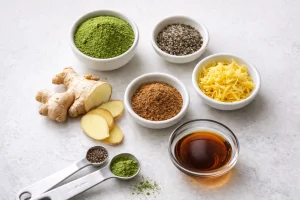 Think in layers: warm base, bright top, and a gentle bitter-tamer.
Warm base flavors (reduce green finish):
Vanilla, browned butter, coconut, toasted oats
Cinnamon and ginger
Cocoa (in small amounts) or carob-like notes
Bright top notes (make green taste fresh, not vegetal):
Lemon peel or orange zest
A touch of tart fruit
Bitter-tamers (shorten the finish):
A pinch of black pepper
A little salt (often under-dosed in sweet baking)
Enough sweetness to round edges
If you like a cozy profile, try cinnamon chips as a warm base. If you want a lively profile, pair moringa with ginger root plus citrus peel. And if you’re a kombucha maker, you already know how tartness can “clean up” a finish. A tiny fruit-like tart accent can do the same in baked goods.
For a tart, floral edge that reads bright rather than green, you can experiment with a small infusion or syrup made from hibiscus flowers and use it as part of the liquid in glaze or drizzle.
Two base recipes that consistently avoid the aftertaste
These are templates, not precious formulas. The goal is repeatability. Weigh, note, adjust.
Recipe 1: “Clean Green” Moringa Muffins (best starter)
Designed for smooth flavor and minimal aftertaste. This is where moringa powder baking usually wins on the first try.
For 12 standard muffins:
Flour: 250 g
Moringa: 2.5 g to 3.5 g (1 1/4 to 1 3/4 tsp)
Baking powder: 10 g (2 tsp)
Salt: 3 g (1/2 tsp)
Sugar: 90 g to 110 g (depending on preference)
Eggs: 2
Yogurt or buttermilk: 180 g
Melted butter or coconut oil: 80 g
Vanilla: 2 tsp
Optional bridge: tiny pinch black pepper
Optional lift: 1/2 tsp organic lemon peel
Method:
Whisk dry ingredients thoroughly.
Whisk wet ingredients until silky.
Combine just until no dry pockets remain.
Rest 10 minutes.
Bake at 175°C / 350°F for 16 to 19 minutes.
Why it works: yogurt + fat + rest time hydrates the moringa and rounds the finish.
Recipe 2: “Toasty Green” Oat Pancakes (fast, forgiving)
Pancakes are a great test batch because you can adjust mid-stream.
For about 8 pancakes:
Flour: 120 g
Oat flour or blended oats: 60 g
Moringa: 1.5 g to 2.5 g (3/4 to 1 1/4 tsp)
Baking powder: 6 g (1 1/4 tsp)
Salt: 2 g (scant 1/2 tsp)
Egg: 1
Milk: 220 g
Melted butter: 25 g
Sweetener: 20 g to 30 g
Warm notes: 1/2 tsp cinnamon chips (or cinnamon powder)
Optional: pinch black pepper
Method:
Mix dry, mix wet, combine.
Rest 8 minutes.
Cook on medium heat, not high. Let them brown.
Why it works: oats + browning push the flavor toward “toasty,” which keeps moringa from tasting raw.
If you want an herbal tea-style finish instead of a warm spice finish, a tiny hint of chamomile whole flowers can be infused in warm milk (strain, cool, then use as liquid). It reads honeyed and soft.
Kombucha makers: a strict, repeatable 2F method that pairs with moringa baking
If you’re baking with moringa, you can build a matching bottle-conditioned kombucha that tastes intentional with the baked goods. The trick is consistency: measure, dose, and keep the plant material out of the bottle unless you truly want sediment.
This section keeps moringa powder baking and beverage production speaking the same language: controlled inputs, repeatable outputs, clean flavor.
Batch notes setup (do this every time)
Write down:
Base kombucha temperature at bottling
Sugar source and grams per bottle (if adding)
Concentrate grams per bottle
Days at room temp
Fridge time before tasting
Option A: Tea concentrate dosing (recommended)
This avoids gritty texture and keeps flavor smooth.
Make a moringa-ginger concentrate:
Water: 300 g
ginger root: 6 g to 10 g (sliced or crushed)
moringa powder: 2 g to 4 g
Optional tart note: hibiscus flowers 1 g to 2 g
Sweetener for 2F support: 20 g sugar for the whole concentrate (optional)
Method:
Heat water to 80°C / 176°F.
Add ginger and hibiscus (if using). Steep 8 minutes.
Whisk in moringa off heat. Steep 4 minutes.
Strain if possible (fine mesh plus a coffee filter helps). Chill fully.
Dosage per 16 oz / 473 ml bottle:
10 g to 25 g concentrate (about 2 to 5 tsp)
Start at 15 g if you want a noticeable but clean profile.
Consistency tip: weigh the concentrate into each bottle. A teaspoon varies. A scale does not.
Option B: Direct botanicals in bottle (optional)
This is more rustic. Expect sediment.
Per 16 oz / 473 ml bottle:
moringa powder: 0.2 g to 0.6 g (about a tiny pinch up to 1/4 tsp)
ginger root: 1 g to 3 g (thin slice or small dice)
Optional: organic lemon peel a tiny pinch
Method:
Add botanicals first.
Fill with finished kombucha, leaving proper headspace.
Cap, ferment at room temp 2 to 4 days, then refrigerate.
If you do this, chill at least 24 hours before opening. Cold liquid holds carbonation better and reduces volcano moments.
This is also where your baking mindset helps: the same “start low, adjust up” discipline from moringa powder baking keeps your 2F clean and drinkable.
Troubleshooting: flavor, carbonation, sediment, aroma loss
Problems are usually predictable. Here’s how to fix them without guesswork.
Flat flavor (baked goods)
Cause: moringa dose too low, or too much competing spice.
Fix: increase moringa by 0.5 g per 250 g flour next time. Add more vanilla or citrus instead of more moringa if the finish is already green.
Flat flavor (kombucha 2F)
Cause: concentrate dose too low, or fermentation too cold.
Fix: increase concentrate by 5 g per bottle. Ferment at a slightly warmer room temp.
Too tart
Baked goods: acidity plus moringa can read sharp. Reduce yogurt slightly or add 10 to 15 g more sweetener.
Kombucha: shorten 2F time or reduce hibiscus.
Over-carbonation
Cause: too much sugar, too warm, too long.
Fix: chill fully before opening. Next batch, reduce added sugar or shorten 2F by a day.
Sediment and gritty texture
Cause: direct moringa in bottle or poorly hydrated batter.
Fix: use Option A concentrate dosing for kombucha. For baking, rest batter 8 to 12 minutes and whisk dry ingredients more thoroughly.
Aroma loss
Cause: baking too hot or too long; concentrate made too hot.
Fix: keep moringa out of boiling water. Bake at moderate temp and avoid overbaking. Gentle heat preserves the “fresh green” that makes moringa powder baking pleasant.
If your flavor keeps finishing too green even at low dosage, check the moringa itself. Old powder tastes dull and grassy. Fresh powder tastes bright and clean.
Storage + quality: keeping moringa vibrant (and your results consistent)
Moringa is sensitive to humidity, light, and time. Treat it like a delicate leaf.
Store in an airtight container with a tight seal.
Keep it cool, dry, and away from direct sunlight.
Avoid storing it near the stove where steam lives.
Quality cues:
Color should be a lively green, not gray-green or brownish.
Scent should be clean and leafy, not dusty.
If the powder clumps heavily, humidity got in, and flavor often goes flat.
For other botanicals you’re pairing with it, store the same way. Flowers and peels lose aroma fast when exposed to air. If you’re making a pantry that supports consistent baking and 2F, rotate stock and label purchase dates.
If you want a calm, soft aromatic partner that stores well when kept airtight, consider chamomile whole flowers. For a deeper roasted note in tea blends, dandelion root tea is a classic “grounding” ingredient.
Safety and compliant herbalist language
This article is for culinary and beverage-crafting purposes. Moringa and other botanicals are widely used in food traditions and are often used by herbalists as part of everyday routines, but this is not medical advice and it is not meant to diagnose, treat, cure, or prevent any disease.
If you are pregnant, nursing, managing a health condition, or taking medications, it’s smart to check with a qualified professional before making major dietary changes or using large amounts of botanicals. Start small, observe how you feel, and keep your recipes in normal culinary ranges.
For most people, the “safest” path is also the tastiest: modest doses, good ingredients, and a repeatable method. That’s the heart of moringa powder baking without the aftertaste.
FAQ
What is the easiest way to avoid the green aftertaste?
Use a low dose, add enough fat and sweetness, and rest the batter 8 to 12 minutes before baking.
How much moringa is too much in muffins?
For most palates, above 4 g per 250 g flour starts pushing into a stronger finish. If you want more color, increase slowly in 0.5 g steps.
Does black pepper make it spicy?
Not at these amounts. A tiny pinch of black pepper acts more like an aroma “bridge” than a heat source.
Can I use moringa in chocolate brownies to hide the taste?
Yes, cocoa can mask green notes, but it can also make bitterness more noticeable if you overdose. Start mild and keep the bake time controlled.
Should I sift moringa powder?
If your moringa clumps, sifting helps. More importantly, whisk it thoroughly into dry ingredients so it disperses evenly.
Can kombucha makers use moringa in 2F without sediment?
Yes. Use tea concentrate dosing (Option A) and strain well. Avoid adding raw powder directly if you dislike sediment.
How does moringa powder baking relate to fermentation flavors?
Both are about controlled inputs. Weigh your dose, note your method, and adjust one variable at a time.
What’s a clean flavor pairing if I want it bright and not spicy?
Citrus is your friend. A little organic lemon peel plus vanilla keeps the finish fresh and light.