Dandelion Root Tea: Brew for Roasty Depth (Not Bitter)
If you want a cup that drinks like a cozy, roasted “dark” tea without turning harsh, dandelion root tea is one of the most satisfying roots to learn. It has that toasted, pantry-warm aroma that feels almost like coffee, but it behaves like a root, not a bean. That means you get body from time, heat, and the right ratio, not from pushing it harder and hoping. The goal is simple: pull out round, roasty depth first, then let the bitter edges stay politely in the background. ☕🌿
This is an herbalist-style, production-minded brew guide for home tea drinkers and kombucha makers. You will get repeatable ratios in grams and teaspoons, a dependable steeping workflow, and a strict 2F method that scales (including batch notes you will actually use). We will also build a clean pairing with lemon myrtle for lift and finish.
What “roasty” really means in roots (and why bitterness sneaks in)
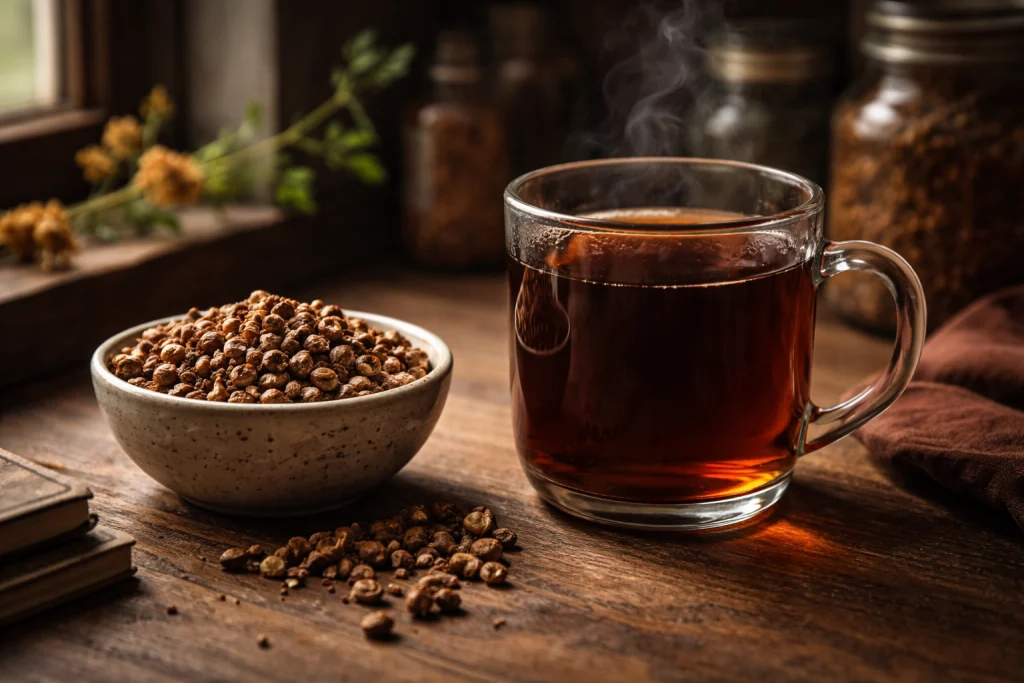
 Roasty flavor in roots is largely about toasted sugars and browned plant solids that read as cocoa, crust, and caramel. With dandelion root, the pleasant roast notes show up when you use enough material and give it time at the right temperature. Bitterness shows up when extraction gets uneven: too hot for too long with too little water, too fine a cut, or a boil that agitates the root into a sharp edge.
Think of it like this. You are balancing three levers: particle size, temperature, and contact time. If you crank all three at once, you can overshoot. If you control two and keep one gentle, the cup gets round and full instead of stern.
If you want a reliable “roast base” herb that stays consistent across batches, start with fresh, aromatic dandelion root tea.
How to Brew Dandelion Root Tea for Roasty Depth (Not Bitter)
This is the core workflow. It is designed to be consistent even if you are brewing on a busy day or prepping concentrate for kombucha.
- Warm your vessel. Rinse your teapot or jar with hot water so the brew does not lose temperature immediately.
- Measure by weight when possible. Roots vary in cut size and density, so grams are more stable than spoons.
- Use near-boiling water, then step down. Pour water that has just reached a boil, then let the brew settle slightly off the boil during steeping.
- Strain cleanly. A fine mesh strainer prevents root dust from continuing to extract in the cup, which is one of the sneaky ways bitterness increases over time.
- Taste at a fixed time. Decide your “standard” tasting time (like 12 minutes) and keep it. Consistency beats improvisation.
For a bright, citrusy lift that keeps the finish clean, blend in a small amount of organic lemon myrtle.
Roast level, cut size, and why your brew time keeps changing
If your root is roasted darker, it usually extracts faster into “deep” flavors. If it is lighter, it can read more woody and takes longer to round out. Cut size matters just as much. A fine cut or powder extracts quickly and can jump into harshness. A cut-and-sifted root extracts slower and tends to stay smoother.
A simple production trick: pick one cut size and one steep time and treat them as your baseline. When you change suppliers or roast level, do not change five variables. Change one. For example, keep ratio and temperature the same, then adjust only time by 2-minute steps until the cup lands.
If you are building a consistent house profile, write down: root cut description, grams per brew, water temperature at pour, steep time, and tasting notes. This turns dandelion root tea from “vibes” into a repeatable craft.
If you like a roast profile with a gentle sweetness, try rounding the blend with a pinch of licorice root.
Water temperature, steep timing, and the “off-boil” sweet spot
Roots can handle heat, but boiling the root aggressively for a long time can pull sharper notes, especially when the cut is fine or there is lots of dust. For most home brews, use a near-boil pour and steep covered. If you want more body without bite, increase the ratio slightly before you extend time.
Practical targets that stay consistent:
Pour temperature: 96–100°C (205–212°F)
Steep: 10–15 minutes, covered
Rest: 1–2 minutes after steeping before you strain, so fines settle
If your result is thin, do not chase it by steeping 25 minutes. Instead, increase grams by a small step and keep time in the same window. This keeps the cup roasty and avoids the drying finish that can show up when extraction goes long.
For a “spark” note in blends that still plays well with roast, keep orange peel on hand.
Exact ratios (grams and teaspoons) for a smooth cup and a stronger base
Use these as starting points. Roots are forgiving, but this gives you clean repeatability.
Single cup, roasty but smooth (8 oz / 240 ml)
Dandelion root (cut): 3.0 g (about 2 teaspoons)
Water: 240 ml
Steep: 12 minutes, covered
Optional lemon myrtle: 0.2 g (about 1/4 teaspoon)
Stronger mug, latte-style body (12 oz / 355 ml)
Dandelion root (cut): 5.0 g (about 1 tablespoon)
Water: 355 ml
Steep: 12–14 minutes, covered
Optional lemon myrtle: 0.3 g (about 1/2 teaspoon)
Concentrate base for blending (makes about 2 cups / 480 ml concentrate)
Dandelion root (cut): 18 g (about 4 tablespoons)
Water: 550 ml
Steep: 15 minutes, covered
Strain well, then reduce by gentle uncovered simmer until you reach ~480 ml if you want more intensity without extra extraction time
Notes for consistency:
If using teaspoons, level them. Do not heap.
If the root is very fine, reduce steep time by 2–3 minutes to avoid edge bitterness.
Always strain promptly when time is up.
For a tart counterpoint that keeps roast from feeling heavy, add a small amount of hibiscus flowers in blends.
Flavor architecture: building roast, lift, and a clean finish
Roasted roots love contrast. Without contrast, the cup can feel flat, like “brown on brown.” With one bright top note and one gentle spice, it becomes dimensional.
A balanced profile often looks like:
Base: roasted root (depth, cocoa, toast)
Lift: citrusy herb or peel (high aroma)
Bridge: warm spice (ties base to lift)
Optional sweetness: naturally sweet root (rounding)
Try these pairing styles:
Roast + citrus lift: dandelion root + lemon myrtle + orange peel
Keep it bright and aromatic with organic lemon myrtle.Roast + spice bridge: dandelion root + cinnamon + a whisper of citrus
For a bakery-warm bridge note, try cinnamon chips.Roast + ginger snap: dandelion root + ginger + a tiny amount of lemon myrtle
Add crisp warmth with ginger root.
When you blend, think in percentages by weight. A good starting blend for daily drinking is 90% roasted root, 5% lemon myrtle, 5% orange peel. If you want it softer, swap 2–3% of the root for licorice root.
Kombucha 2F with dandelion root: strict, repeatable methods
For kombucha makers, dandelion root tea brings roast depth that can make fruit-forward batches feel more “grown up.” The key is dosing consistently so you get flavor without destabilizing carbonation.
Before you start, decide which approach you are running. Option A is recommended because it standardizes extraction and reduces bottle-to-bottle variability.
Option A: Tea concentrate dosing (recommended)
Make a concentrate using the “Concentrate base for blending” ratio above. Chill it completely.
For each 16 oz / 473 ml bottle, dose:
15–35 ml concentrate (1–2 tablespoons)
Start at 20 ml for a subtle roast note, 30 ml for noticeable depth
Optional lift per bottle:
0.5–1.5 ml lemon myrtle infusion (see below), or use a tiny splash of a pre-made lemon myrtle tea
Fill the rest of the bottle with finished 1F kombucha, leaving about 1–1.5 inches headspace.
Cap and ferment 2F at 22–25°C (72–77°F) for 2–4 days.
Burp only if you have a known over-carbonation history. Otherwise, keep handling consistent and refrigerate when the carbonation is right.
Quick lemon myrtle infusion for dosing
2 g lemon myrtle to 250 ml hot water
Steep 6 minutes, strain, chill
Dose 0.5–1.5 ml per bottle for aroma lift
Option B: Direct botanicals in bottle (optional)
This is more rustic and can be delicious, but it increases sediment and variability.
Per 16 oz / 473 ml bottle:
Dandelion root: 0.3–0.8 g (about 1/4 to 1/2 teaspoon)
Lemon myrtle: 0.05–0.15 g (a pinch, about 1/16 to 1/8 teaspoon)
Add botanicals first, then fill with 1F kombucha, cap, and ferment 2–3 days. Strain into a glass when serving if you dislike sediment.
Consistency tips that matter
Weigh your botanicals for at least your first five batches. Once you lock in a profile, you can translate to spoons.
Keep batch notes: date, room temp, dosing ml or grams per bottle, 2F days, carbonation result, and aroma notes.
If you want the same flavor every time, do not change root cut size mid-series. Change one variable at a time.
If you want a crisp, fresh “green lift” option for other batches, keep peppermint leaf available for contrast blending.
Troubleshooting: flat flavor, tartness, over-carbonation, sediment, aroma loss
Flat flavor (tastes thin, “brown water”)
Increase dose before you increase time. For tea: add 1 g per cup and keep steep time similar.
For 2F Option A: move from 20 ml to 30 ml concentrate per bottle.
Make sure you strain promptly. Root fines left in the brew keep extracting and can muddle the profile.
Too tart (kombucha feels sharp, roast feels hidden)
Shorten 2F by 12–24 hours or reduce sugar additions if you use them.
Increase roast dose slightly so the base can stand up to acidity.
Consider adding a tiny bridge spice like cinnamon to round the edges.
Over-carbonation
Reduce 2F time, especially at warmer temps.
Use Option A concentrate dosing. It is more predictable than loose botanicals.
Chill earlier. Cold stops fermentation faster than any “burping routine.”
Sediment overload
Switch to Option A and strain the concentrate through fine mesh.
If using Option B, reduce root amount and avoid very fine cuts.
Let bottles settle upright in the fridge and pour gently.
Aroma loss (smells great at bottling, dull later)
Keep lemon myrtle infusion chilled and add it last.
Use airtight storage for botanicals and keep them away from heat.
Refrigerate promptly when the carbonation is right. Warm days keep chewing up aroma.
For a red-fruit, tart backbone in other 2F profiles, use hibiscus flowers as a controlled concentrate.
Storage + Quality: keeping roots fresh, roasty, and clean
Roots hold up well, but they still age. The first quality cue is aroma. Fresh roasted root smells like toast, cocoa, and warm earth. Stale root smells flat, dusty, or faintly cardboard-like.
Storage rules that keep quality high:
Airtight container with minimal headspace
Cool, dark cupboard away from the stove
Dry hands and dry scoops only (humidity is the enemy)
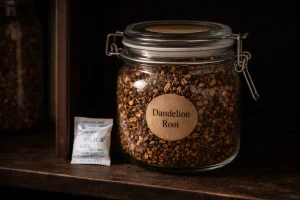
If you live in a humid climate, consider adding a food-safe desiccant pack stored outside the herb bag but inside the container
Color and scent cues:
Good: warm brown, rich roast aroma
Watch: very pale pieces with weak aroma (may brew woody)
Avoid: musty smell, clumping, or visible moisture
If you blend ahead, label the blend with date and ratio. Small production habit, big payoff.
For a bright, stable citrus note that stores well, keep orange peel in airtight jars.
Safety and compliant language for herbal beverages
This is a food-style beverage guide, not medical advice. Herbalists traditionally use many roots and leaves as part of daily routines, but individual needs vary. If you are pregnant, nursing, on medications, or managing a health condition, talk with a qualified professional before making significant changes to your diet.
Practical safety notes for beverage makers:
Use clean equipment and strainers. Biofilm buildup can throw off flavor and fermentation.
For kombucha, keep your process consistent and avoid contamination by using sanitized bottles and tools.
Introduce new botanicals in small amounts first so you can evaluate taste and tolerance.
Avoid making disease claims. Keep language in the lane of flavor, tradition, and general wellness routines.
If you want a simple “warm spice” that stays within classic beverage use, try cinnamon chips in small, controlled amounts.
FAQ
How do I keep dandelion root tea from tasting bitter?
Use a slightly higher ratio and a normal steep time instead of steeping forever. Strain promptly, avoid overly fine cuts, and keep your steep covered around 10–15 minutes.
Can I simmer the root instead of steeping?
Yes. A gentle simmer can add body, but keep it controlled. Simmer lightly for 10 minutes, then steep off heat for 5 minutes, then strain. Avoid aggressive boiling that stirs up fines.
What is the best dose per 16 oz kombucha bottle?
For concentrate dosing, start at 20 ml per 16 oz / 473 ml bottle and adjust up to 35 ml. If using loose botanicals, start around 0.4 g root per bottle to limit sediment and variability.
Does lemon myrtle work with roasted roots?
Yes. Lemon myrtle adds bright lift and a clean finish. Use it lightly, especially in kombucha, because it can dominate if over-dosed.
Can I blend dandelion root with hibiscus or ginger?
Absolutely. Hibiscus brings tart color and snap, ginger adds warmth and structure. Use them as accents so roast stays the base.
How long should I store dried botanicals for best flavor?
For best aroma, aim to use within 6–12 months, depending on storage conditions. Roots can last longer, but scent is your best judge.
Is dandelion root tea caffeinated?
No, it is naturally caffeine-free. That is why many people use it as a nighttime “roast-style” beverage.
Why does my bottle have so much sediment?
Sediment usually comes from fine particles and direct botanicals. Switch to concentrate dosing, strain more finely, or use a coarser cut.
Conclusion
A great cup is not about pushing harder. It is about choosing a steady ratio, controlling time, and letting roast notes arrive before bitterness gets invited to the table. Once you dial in your baseline, you can scale the same profile into concentrates for kombucha and keep your batches consistent without guesswork. If you want a dependable, roasty foundation that blends beautifully with citrus lift, keep dandelion root tea stocked and treat your process like a small craft production line, even at home.